Installation Description of JCB Genuine 320/03029 Rear Oil Seal
IntroductionWhen working on heavy machinery, like JCB equipment, ensuring that every component functions optimally is vital for performance and safety. One such essential part is the JCB Genuine 320/03029 Rear Oil Seal. Proper installation of this oil seal ensures your machine runs smoothly and prevents oil leaks that can lead to significant damage. This guide will walk you through the step-by-step process of installing this component effectively.
Tools and Materials Needed Before starting the installation, gather the necessary tools to avoid interruptions: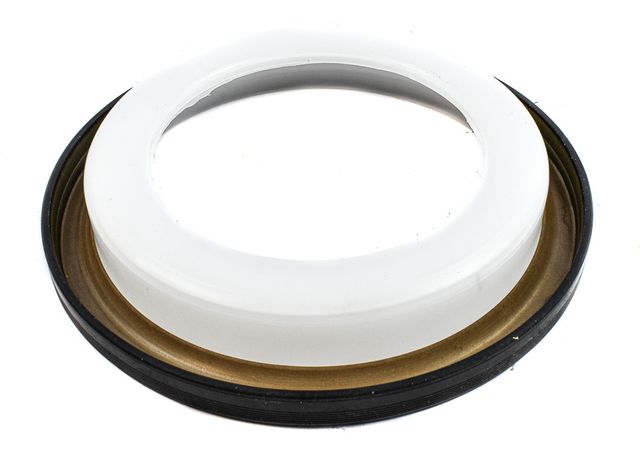
- JCB Genuine 320/03029 Rear Oil Seal
- Clean cloths and degreaser
- Seal installation tool or drift
- Socket set and wrenches
- Protective gloves
- Safety goggles
Preparation Checklist:
- Ensure the work area is clean and well-lit.
- Wear protective gear, including gloves and safety goggles.
- Verify that the new oil seal is undamaged and free from any defects.
Safety Precautions- Safety is paramount when handling mechanical installations. Follow these precautions:
- Disconnect Power Sources: Always turn off and disconnect power to the equipment before beginning.
- Wear Protective Equipment: Use gloves and goggles to protect your hands and eyes from oil or debris.
- Avoid Slip Hazards: Clean any spilled oil immediately to prevent slipping.
Step-by-Step Guide to Removing the Old Oil Seal
- Locate the Rear Oil Seal: Refer to your JCB manual to identify the exact location of the rear oil seal.
- Drain the Oil: Safely drain any oil from the section to prevent spillage.
- Remove the Old Seal: Use an appropriate seal removal tool or a flathead screwdriver, applying even pressure to avoid damaging the surrounding areas.
- Clean the Area: Wipe down the Area using a clean cloth and degreaser to remove any residual oil or debris.
Inspection Before Installation- Thoroughly inspect the exposed Area for wear or damage:
- Check for Wear and Tear: Look for signs of abrasion or damage on the shaft or housing.
- Ensure Cleanliness: Any debris or oil residue can prevent proper installation, so make sure the surface is spotless.
Installation Steps for the New JCB 320/03029 Oil Seal
- Position the New Seal: Align the new oil seal so that it sits perfectly over the housing.
- Press the Seal into Place: Use a seal installation tool to push the seal evenly into the slot. Avoid using excessive force, which can damage the seal.
- Verify Alignment: Ensure that the oil seal is seated flush with the surface for a proper fit.
Ensuring a Proper Fit- Check the seal after installation:
- Run a Visual Inspection: Confirm there are no visible gaps.
- Press-Test: Lightly press around the edges to ensure it’s firmly seated.
Common Installation Mistakes and How to Avoid Them
- Over-tightening: Avoid applying too much pressure, which can distort the seal.
- Improper Tool Use: Always use the recommended tools to maintain precision.
Post-Installation Checks- After fitting the new oil seal, perform these checks:
- Inspect for Alignment: Ensure the seal is evenly in place.
- Test for Leaks: Run a low-pressure oil test to verify that the seal is functioning correctly.
Troubleshooting Potential Issues
- Premature Seal Failure: If you notice oil leaks soon after installation, check for misalignment or debris under the seal.
- Signs of Incorrect Installation: Oil seepage or noise may indicate improper placement or damage during installation.
Maintenance Tips for Prolonged Seal Life- To extend the life of your JCB oil seal:
- Regular Inspections: Check the seal periodically for any signs of wear.
- Keep the Area Clean: Ensure that the surrounding Area is free from dust and contaminants.
- Use Genuine Parts: Always use genuine JCB components for optimal performance.
Benefits of Using Genuine JCB Parts- Genuine JCB parts, such as the 320/03029 rear oil seal, are engineered to meet the highest standards:
- Enhanced Durability: They are made to withstand the rigors of heavy-duty use.
- Optimal Fit and Function: These parts are designed specifically for JCB machines, ensuring precise fit and efficient performance.
FAQs on Installing JCB Genuine 320/03029 Rear Oil Seal
Qus. What is the best way to ensure a leak-free seal?
Ans. Ensure the Area is clean, and use a proper seal installation tool for even pressure.
Qus. How often should the seal be checked?
Ans. It is recommended that the seal be inspected every 250 operating hours or during routine maintenance.
Qus. Can non-genuine seals be used as replacements?
Ans. While non-genuine parts may fit, they often do not offer the same durability and reliability as genuine JCB components.
Qus. What should I do if I detect a leak post-installation?
Ans. Re-examine the seal for alignment issues and check for debris or damage.
Qus How long does the installation process take?
Ans. The entire process usually takes 1-2 hours, depending on experience and preparation.
Qus. Are there specific brands of tools recommended for this job?
Ans. Using high-quality, manufacturer-recommended tools is best to ensure accurate installation.
Conclusion: Installing the JCB Genuine 320/03029 Rear Oil Seal correctly is crucial for maintaining your equipment’s efficiency and longevity. By following these detailed steps and tips, you can ensure a proper installation, minimize downtime, and extend the life of your machinery.
External Resources and Further Reading
- Visit JCB’s Official Website for more maintenance guides.
- Reference JCB’s operator manual for specific instructions related to your model.
